- Published on
Kubernetes Home Lab
- Authors
- Name
- Carlos Santana
- @csantanapr


I'm starting a home lab using Intel NUC (amd64) and Raspberry Pi (arm64) and the inention is to run a production Kubernetes using K3s and Knative
I will collect my notes in a series of blog posts.
Intel Nuc
I bought the Intel NUC 10 NUC10i3FNH the H stands for High. The high model allows you to add an SSD in addition to the NVME disk.
Good places to get an Intel NUC are SimplyNuc and Newegg
Spec
- Internal Drive Form Factor: M.2 and 2.5" Drive
- Total Cores: 2
- Total Threads: 4
- Max Turbo Frequency: 4.10 GHz
- Max memory size: 64GB
Update Firmware
Download the firmware from Intel for your model, download the CAP file and copy it to a USB drive formatted fat32.
Then press the power button for 3 seconds and release before the 4 second, select Update Firmware option and follow the instructions
Download VMware ESXi
There is a free version with registration, Register and download from VMware.
Download ISO image. You need to copy the ISO file to a USB flash drive (Minimum 8GB).
Create USB installer on macOS
If you have Windows use Rufus
- Insert your UFD into your Mac and launch Terminal. Enter the following command to identify the mounting point assigned to your USB drive:
diskutil list
The output should look similar to the text below, where my drive is assigned mount point /dev/disk2. We'll need this information for a later step.
/dev/disk7 (external, physical):
   #:                       TYPE NAME                          SIZE       IDENTIFIER
   0:                       FDisk_partition_scheme                        *8.2 GB     disk7
   1:                       DOS_FAT_32  NO NAME                8.2 GB     disk7s1
- We need to format the drive with filesystem FAT32 and partition map MBR using the following command. Don't forget to use the disk# number obtained in the previous step.
diskutil eraseDisk MS-DOS "ESXI" MBR disk7
The output should look similar.
Started erase on disk7
Unmounting disk
Creating the partition map
Waiting for partitions to activate
Formatting disk7s1 as MS-DOS (FAT) with name ESXI
512 bytes per physical sector
/dev/rdisk7s1: 15941184 sectors in 1992648 FAT32 clusters (4096 bytes/cluster)
bps=512 spc=8 res=32 nft=2 mid=0xf8 spt=32 hds=255 hid=2048 drv=0x80 bsec=15972352 bspf=15568 rdcl=2 infs=1 bkbs=6
Mounting disk
Finished erase on disk7
- Once this information is obtained, we'll need to unmount the device--but not eject it--with the following command:
diskutil unmountDisk /dev/disk7
- In this next step, enter the fdisk interactive prompt:
sudo fdisk -e /dev/disk7
Type "f 1" to mark the USB's partition active, so the device is capable of booting the ESXi operating system. Enter "write" to save the configuration and "quit" to return to the Terminal.
- Next, we will need to mount the .ISO downloaded from VMware's website by entering:
hdiutil mount /path/to/ISO
- The .ISO files should be mounted to the Finder and must be copied to the USB drive using the cp command:
cp -R /path/to/mounted/ISO/* /path/to/USB
- After copying the files to the USB drive, we will need to modify a file to set the partition we wish to boot from TextEdit. Open the
ISOLINUX.CFGfile and add the argument "-p 1" so the following line looks like the text below:
APPEND -c boot.cfg -p 1
- Save the document and rename it
SYSLINUX.CFG. Eject your USB drive--it's ready to boot ESXi.
Installing ESXi
Plug the USB drive into the NUC; the installer loads the files into memory so you can choose the same USB drive to install ESXi and boot from, or you can insert a second USB drive.
Is NOT recommened to install ESXi to an USB flash drive, use the local SSD drive for ESXi and the NVME drive for VMFS

On the installer program, do not select the NVME or SSD drives. Select the USB drive. It can be the same USB drive you are booting from.

It will take a few minutes to grab some coffee.

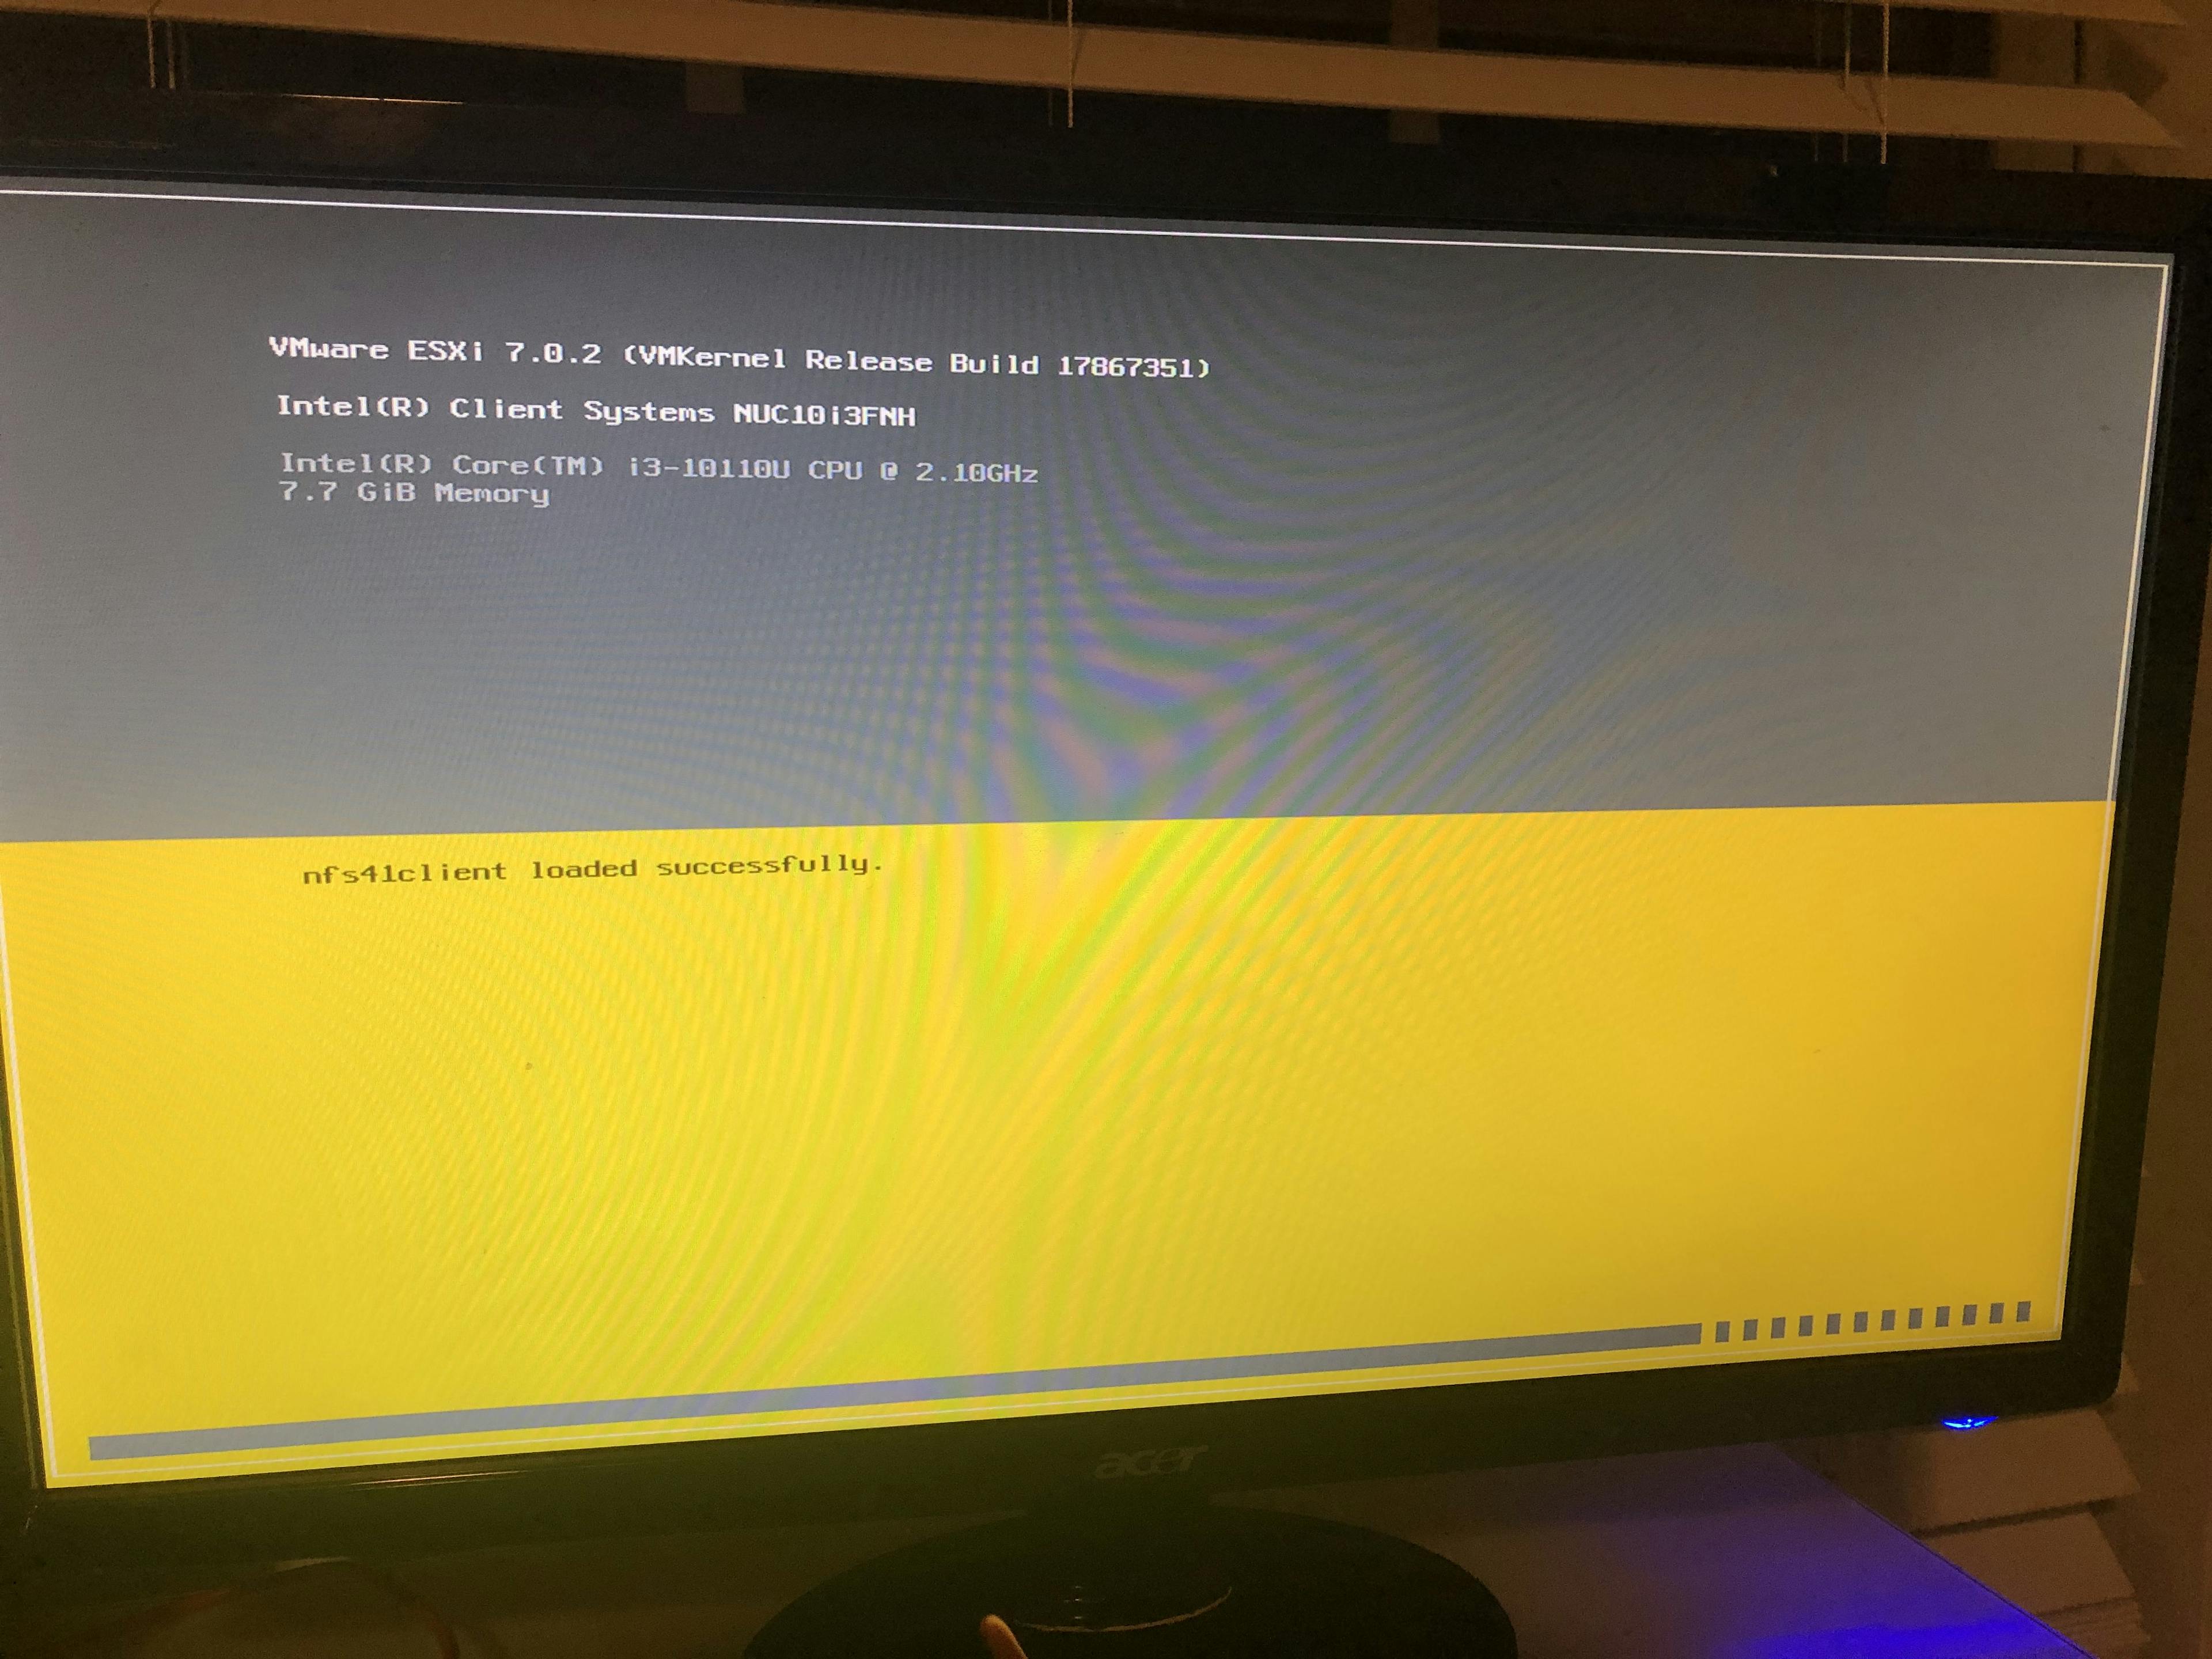
After installing a reboot, ESXi will start from the USB drive into memory and have a screen with the IP address.
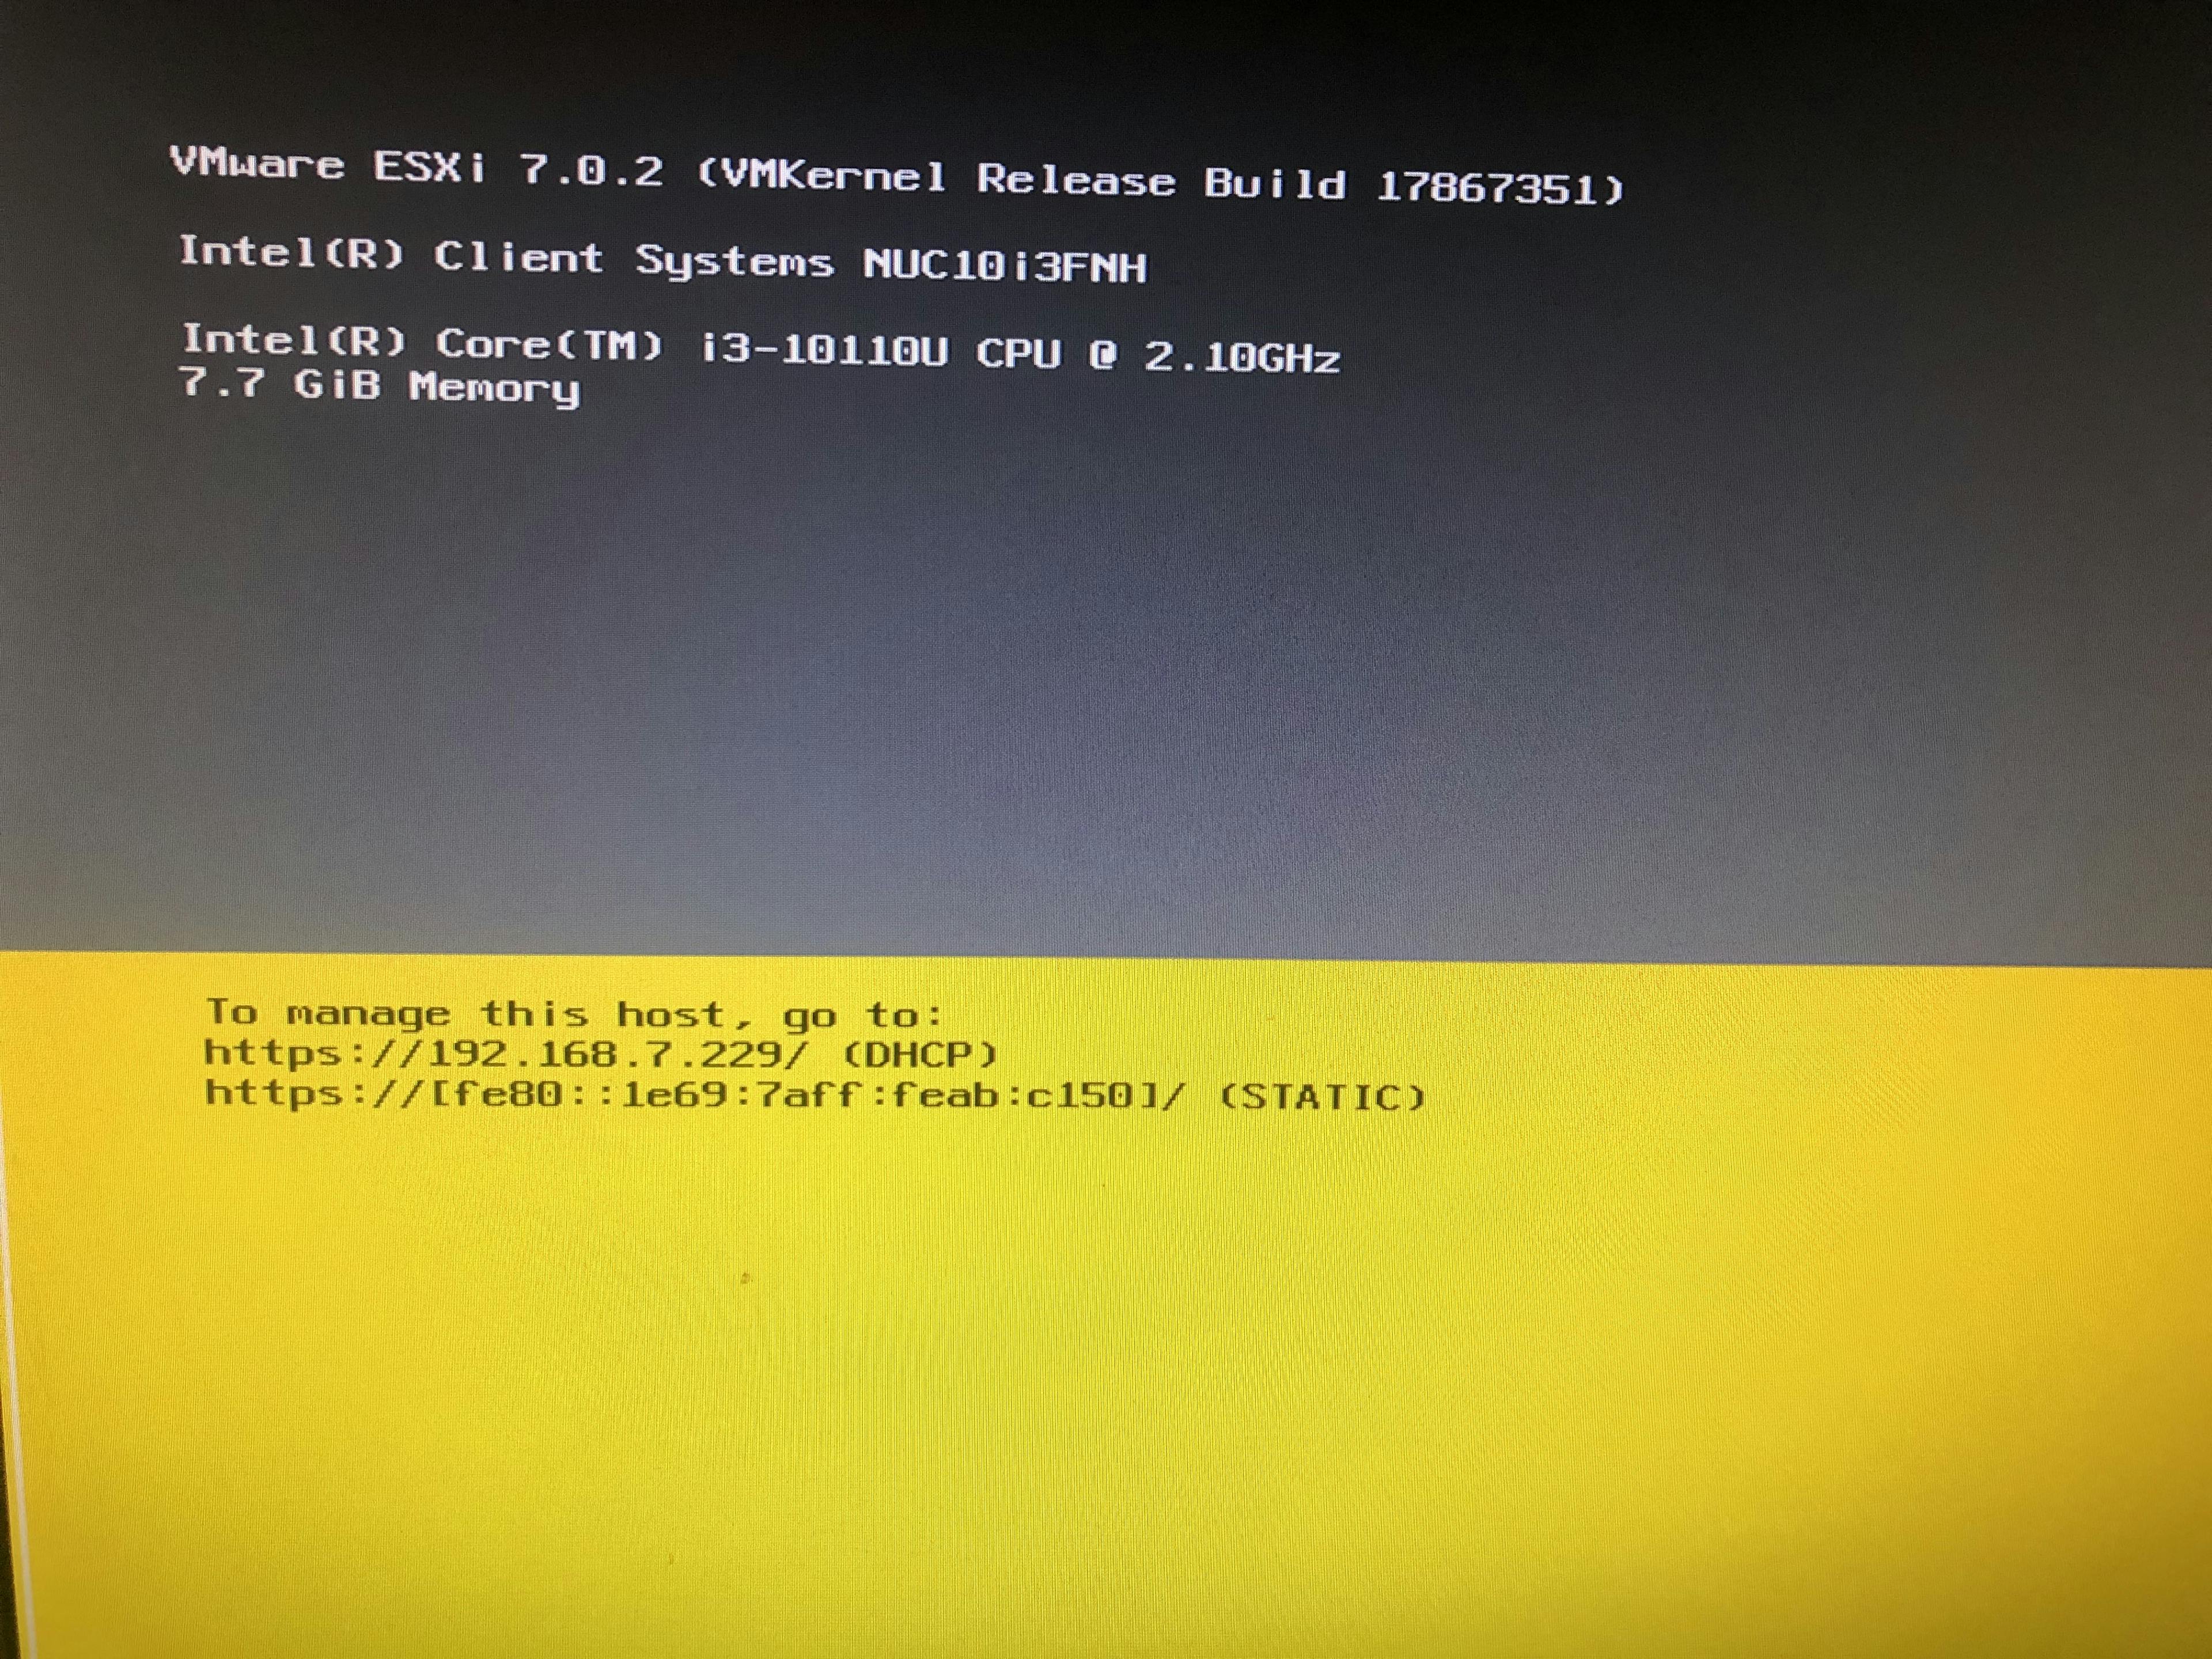
Use the IP to login (user root) from a web browser.


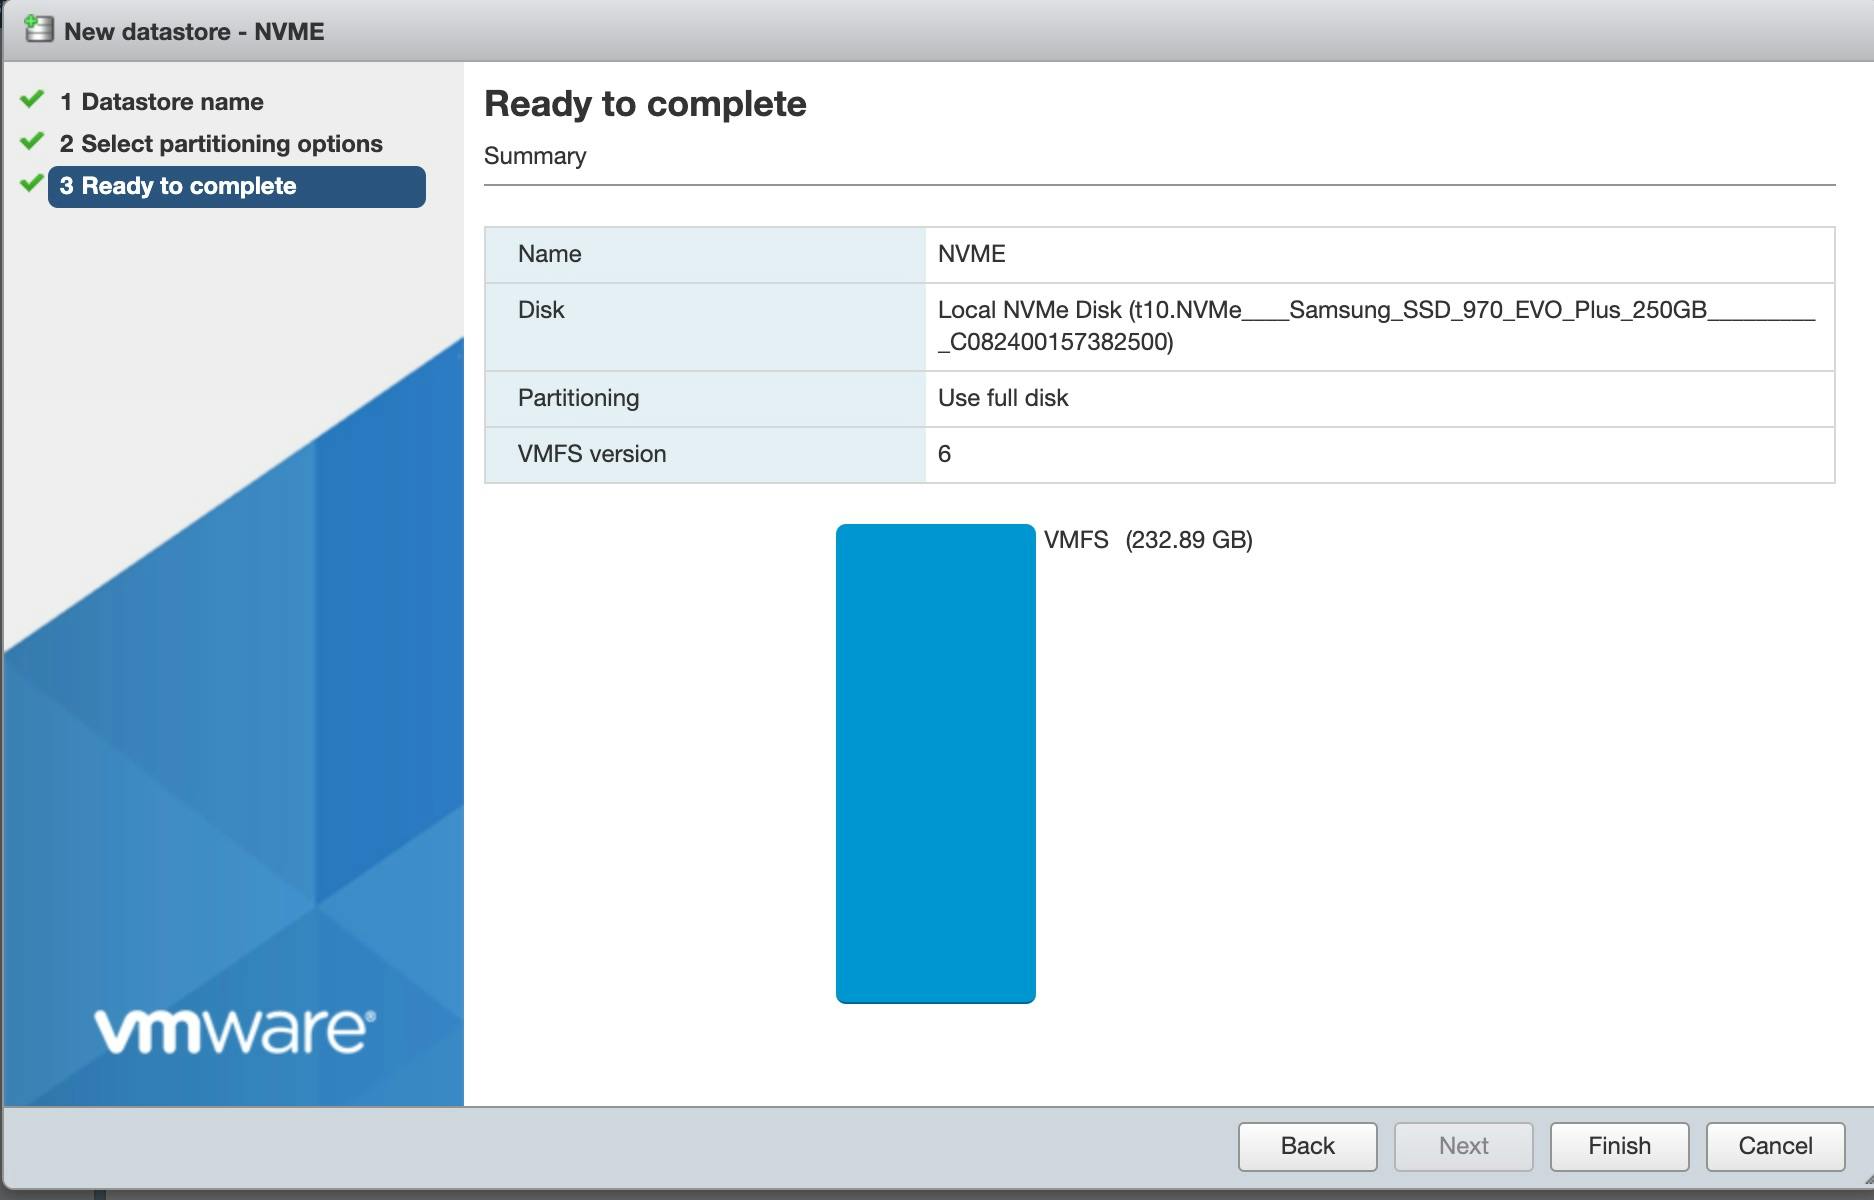
The first thing to do is add storage, select the NVMe or SSD, and add a new datastore. Follow the instructions and select all the space to create a VMFS.

Now you are ready to create your VMs for your Kubernetes Cluster. When you create a Linux VM, edit the CD/DVD device, the UI will let you select an ISO and give you a chance to upload.